Converting Audio File to Music Notes
It’s doable with free tools 🎶
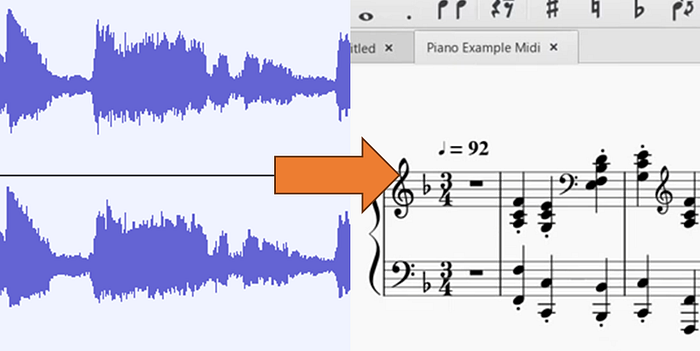
Say we have an audio file of a song, in any popular format, and we want to have the notes for a specific instrument at a specific section of the song. Our input is a wav or mp3 file, and output will be a midi file and sheet music.
The process has several steps, involving several tools, as listed below:
- Slicing the section having the melody we want
(Audacity or AudioMass) - Extracting the specific instrument
(Ultimate Vocal Remover) - Converting audio to midi
(Basic Pitch) - Viewing midi as bars or sheet music
(Online Sequencer, Signal or Musescore)
When get used to this tool pipeline, it becomes easy and fun to experiment with audio files and notes. 🎶👌
Slicing the section having the melody we want
This step is only necessary if we are interested in a specific section of the song, and can be skipped if the whole song is needed to be converted. There are 2 tools we can use for this step.
First tool is Audacity, it’s free and open source software. This desktop application is available on Windows, macOS, Linux, and can be downloaded at https://www.audacityteam.org/download/.
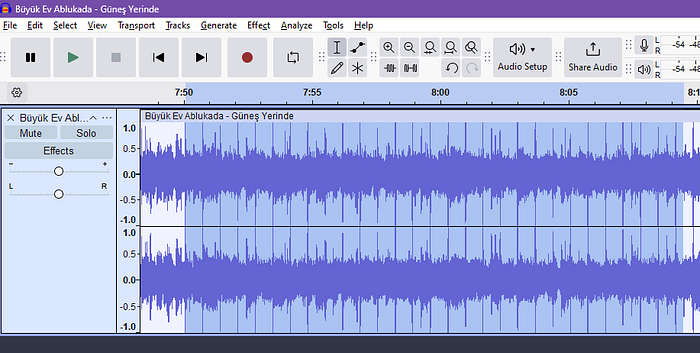
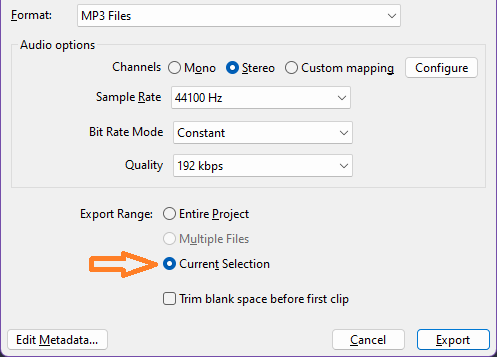
We open our song file and select the section we want. Then click File -> Export Audio, click Export to computer. Give a descriptive name to file, like selection.mp3. Adjust options as you like, and select Current Selection at Export Range options, then click Export.
Second tool is AudioMass, which can be used for this step. We can use it in case we don’t want to install a program, since this is a web-based tool, at https://audiomass.co/.
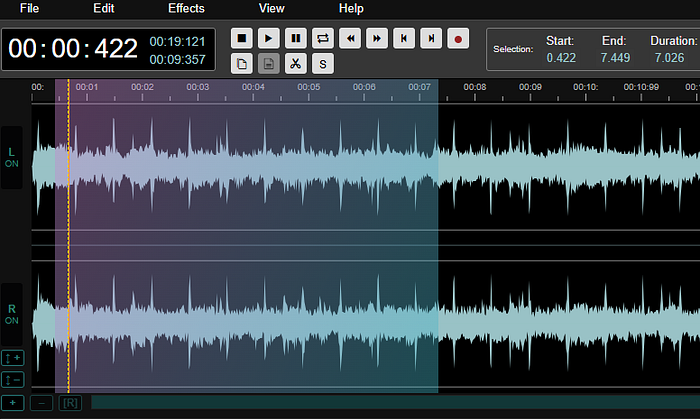
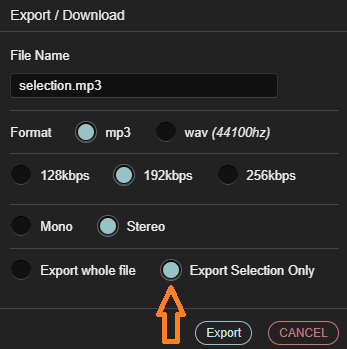
Procedure is the same. We open our song file and select the section we want. Then click File -> Export / Download. Give a descriptive name to file, like selection.mp3. Adjust options as you like, and select Export Selection Only, then click Export.
Extracting the specific instrument
This step is necessary to get a better conversion to a midi file, since without extracting the target instrument there exist harmonic complexities of the song, which in turn will effect the quality of the midi output.
At this step we will use Ultimate Vocal Remover, it’s free and open source software. This desktop application is available on Windows, macOS, Linux, and can be downloaded at https://ultimatevocalremover.com/.
This program takes one audio input and writes several audio outputs. The processing method in between is called a model in this program’s context, and there are lots of models which can be used.
We will use htdemucs_6s model, where htdemucs is a music source separation algorithm, and 6s is for 6 sources (vocals, piano, guitar, bass, drums, other), to which this model will break the input. If you have time, experiment with other models as well, you may find a model that better suits your specific case.
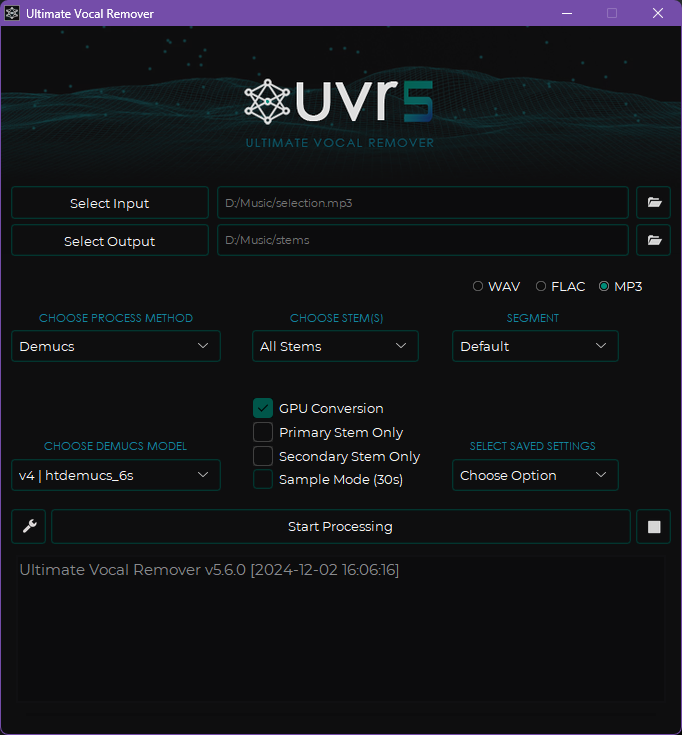
At program’s main window, we select our input file (e.g. selection.mp3) and output folder. As process method we choose Demucs, and as demucs model we choose “v4 | htdemucs_6s”. Settings at the main window should look similar to below view.
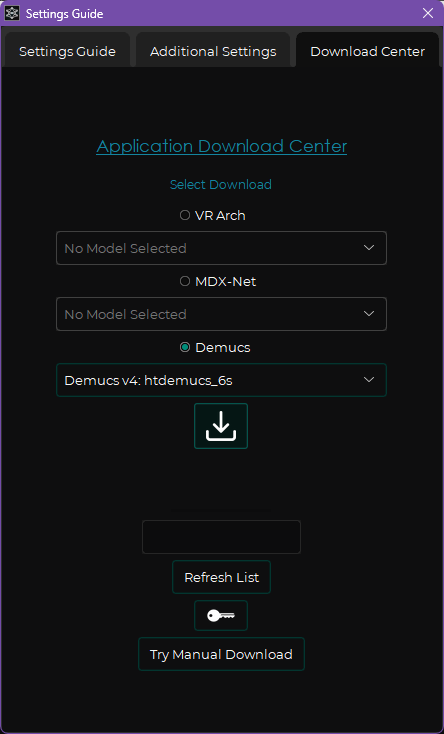
If htdemucs_6s model is not listed, select Download More Models from that list. At the opened dialog, select Demucs and “Demucs v4: htdemucs_6s”, and click download icon, as shown below.
Now we click Start Processing. When process completes, 6 output audio files are written to output folder, with names suffixed with the source name, e.g. 1_selection_(Guitar).mp3.
Converting audio to midi
Now it’s time to actually convert audio file to midi file. There is a great online tool for this, developed by Spotify, Basic Pitch, at https://basicpitch.spotify.com/.
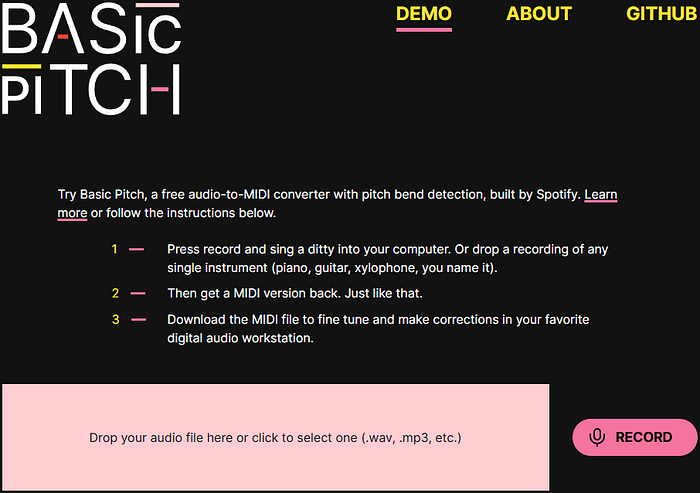
We can drag or select our input audio, e.g. 1_selection_(Guitar).mp3. We can even record right at the GUI. When the file is given, Basic Pitch directly detects notes and creates a view which shows the notes as bars. From this interface, we can play the sequence and download as midi file.
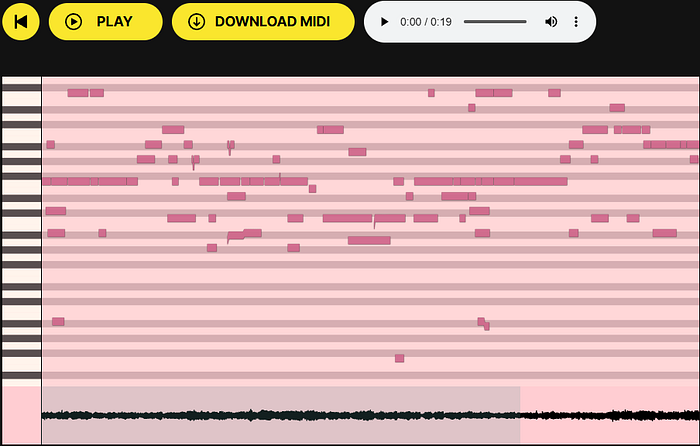
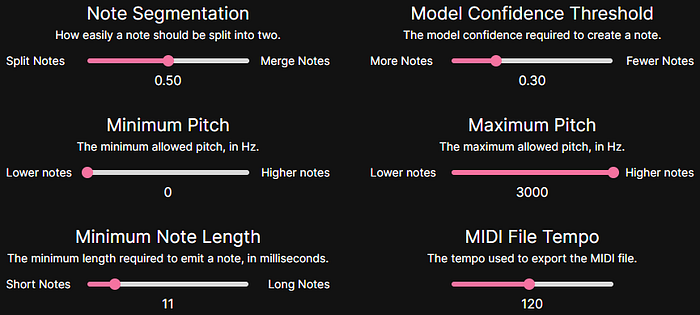
Clicking Show Midi Adjustments will expand conversion parameters, as shown below. Experimenting with these will fine-tune the result. Note segmentation adjusts note density, confidence threshold adjusts total note count, minimum and maximum pitch can be used as high-pass and low-pass filters, note length adjusts minimum time for generated notes, and tempo adjusts the speed.
We finally click Download Midi to get the resulting midi file.
Viewing midi as bars or sheet music
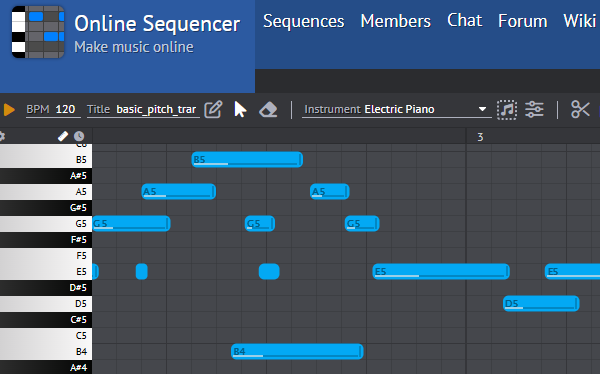
Now we can play with our midi file. For viewing midi file, there are lots of midi editors. We can use one of 2 online editors for this purpose, Online Sequencer or Signal. Below is a bar-notes view of the midi file at Online Sequencer.
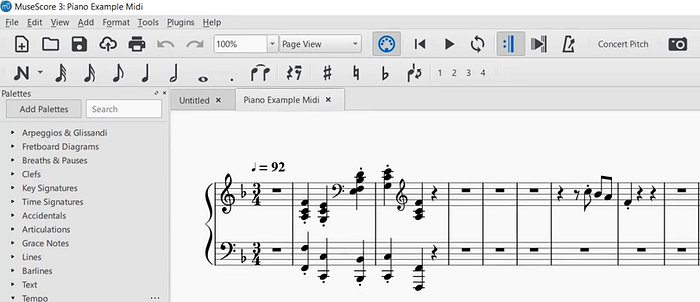
To view midi file as sheet music, we can use Musescore, another free and open-source software, which can be downloaded at https://musescore.org/en/download. Below is an example how Musescore draws sheet music from a midi file.
A paid tool for a more technical approach
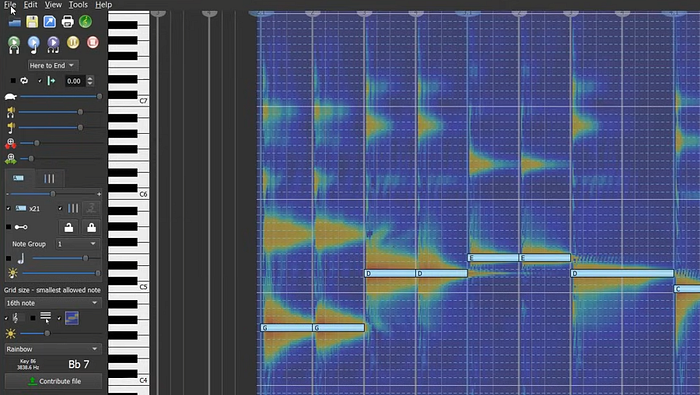
For those who like to view audio as spectrograms, plotted on time and frequency domain, and play with the notes right on these plots, there is a paid tool named AnthemScore, can be viewed at https://www.lunaverus.com/.
AnthemScore is another software for automatic music conversion of audio files to notes. It runs on Windows, Mac, and Linux. It has a free trial with 30 seconds of music conversion. Even when using this tool, I still recommend extracting the target instrument with Ultimate Vocal Remover, and then convert it with AnthemScore.
Summary
So, we started with an song audio file, sliced the section having the melody we want, extracted the specific target instrument, converted audio to a midi file, and viewed midi file as bars and sheet music. 🎶🤘

